

Wet into wet watercolor technique tips I share in this lesson will help you understand this essential watercolor technique.
WET INTO WET Watercolor Technique TIPS - Material List
My Palette
- Winsor & Newton Winsor Yellow
- Winsor & Newton Winsor Yellow Deep
- American Journey Halloween Orange
- Daniel Smith Pyrrol Scarlet
- Winsor & Newton Permanent Rose
- Winsor & Newton Permanent Alizarin Crimson
- American Journey Joe’s Green
- American Journey Cerulean Blue
- American Journey Cobalt Blue
- Winsor & Newton Winsor Blue Red Shade
- Holbein Permanent Violet
Brushes Used During This Painting
- Winsor & Newton One Stroke Sable ½”
- Winsor & Newton Series 995 Synthetic 1″
- ProArte Renaissance Sable 1″
- Robert Simmons White Sable 1½”
- Robert Simmons Skyflow 2″
- Rosemary & Co. Pure Sable Ser. 90 Liners
Painted On Paper
- Saunders Waterford 140lb Cold Press, 15″ x 22″
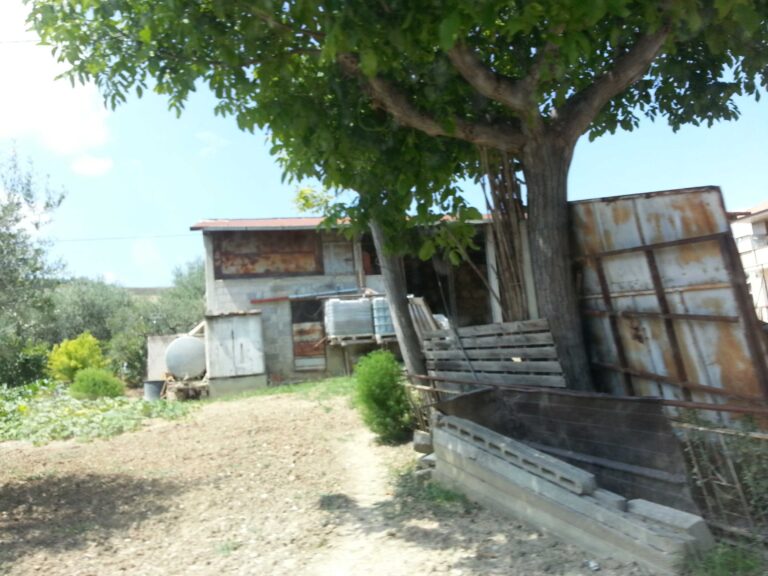
WET INTO WET Watercolor Technique TIPS - Reference Images
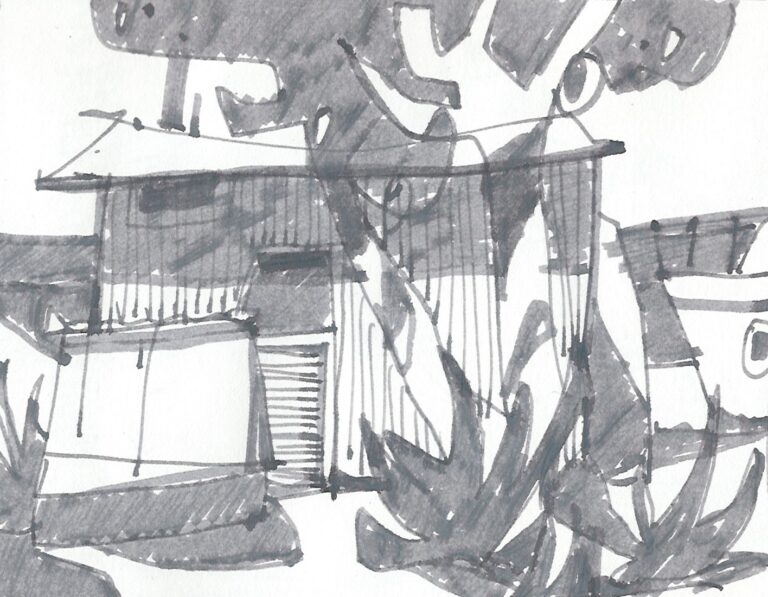
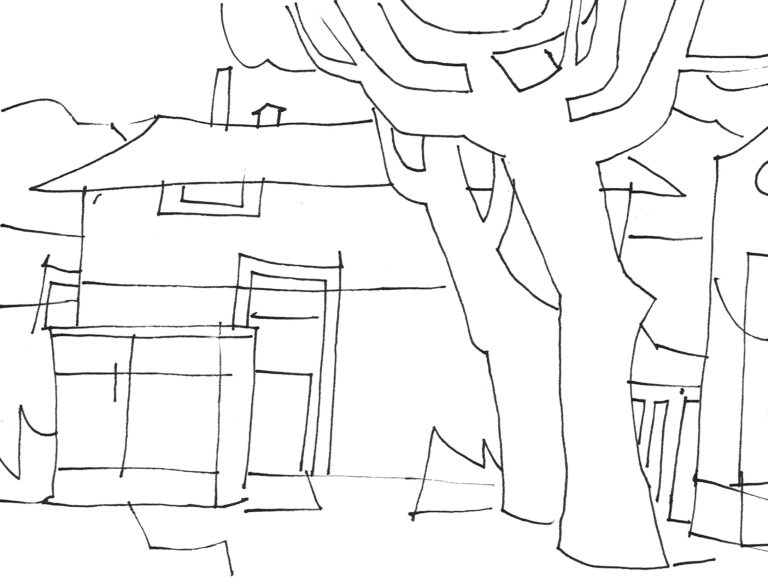
WET INTO WET Watercolor Technique TIPS - The Lesson
Hello everyone and welcome back to my studio. In this second part of our ‘Cabin by the Sea’ demo, we’re going to explore the wet into wet technique a little further.
In the last lesson we learned the basics of the technique and how it can be used control various effects in a representational work.
Regardless of the way the artist uses it, wet into wet produces a specific type of look. It allows for soft diffusions of color, makes continuous washes easier to execute or simply prolongs the drying time of a wash, allowing the artist to work on it longer.
One way to start a wet into wet watercolor is demonstrated in this video. I started my painting by thoroughly wetting the front side of the paper. I then let the paper absorb the water. Once the paper was uniformly damp, I began my painting.
This method produces a fairly short wet into wet painting time. As the paper begins to dry, progressively harder edges are being produced.
This method requires mental planning. Before I begin, I look at the painting and take note of areas where I want to have firm edges with more definition, and areas that should be left soft. Through this “lost & found” variation a basic storytelling element is controlled. The eye is attracted to areas with firm edges.
For example, the shapes representing background hills are painted with soft edges where they connect to the sky plane. The cast shadow on the cabin wall is painted with firm edges to attract the viewer’s attention.
But there are other ways to utilize wet into wet technique. The standard way is to wet the back side of the paper first, flip the paper and wet the front. This assures far slower drying and allows for longer working time. As such, the margin of error is reduced as soft edges can still be achieved well into the painting process.
Another way to utilize wet into wet is to pre-wet a particular shape or part of the painting. Painting into this area then produces wet into wet diffusion while being contained inside the predetermined part of the painting.
Lastly, you can start by painting a wash on dry paper but before it dries, charging it with another color, adding detail or darker accents.
And that is all for today’s lesson. I hope that you learned something useful and that you enjoyed the video. If you did, please consider leaving a like, commenting or subscribing to my channel and I’ll see you in the next one.